by Lee Bussy; “LBussy” on HomeBrewtalk.com
Update 7/20/20: A gentleman from Perlick reached out to me about this post. He’s informed me that as of May 2017, faucets in stock at Perlick were all 304 SS which eliminated this issue. To identify the newer 304SS taps, he shared:
There should be a date code laser-etched underneath the faucet body, so the date codes ending with “17C”, “18C”, “18D”, “19D”, or “20D” will be the all 304 stainless steel construction.
Perlick staff member (personal communication, July 20, 2020)
I want to thank Perlick for reaching out to provide this information.
What follows is the original article written circa 2016 when people were having this issue. Occasionally I have to re-passivate my taps, and it’s valuable as a method to passivate other items. What follows is the original post for reference purposes.
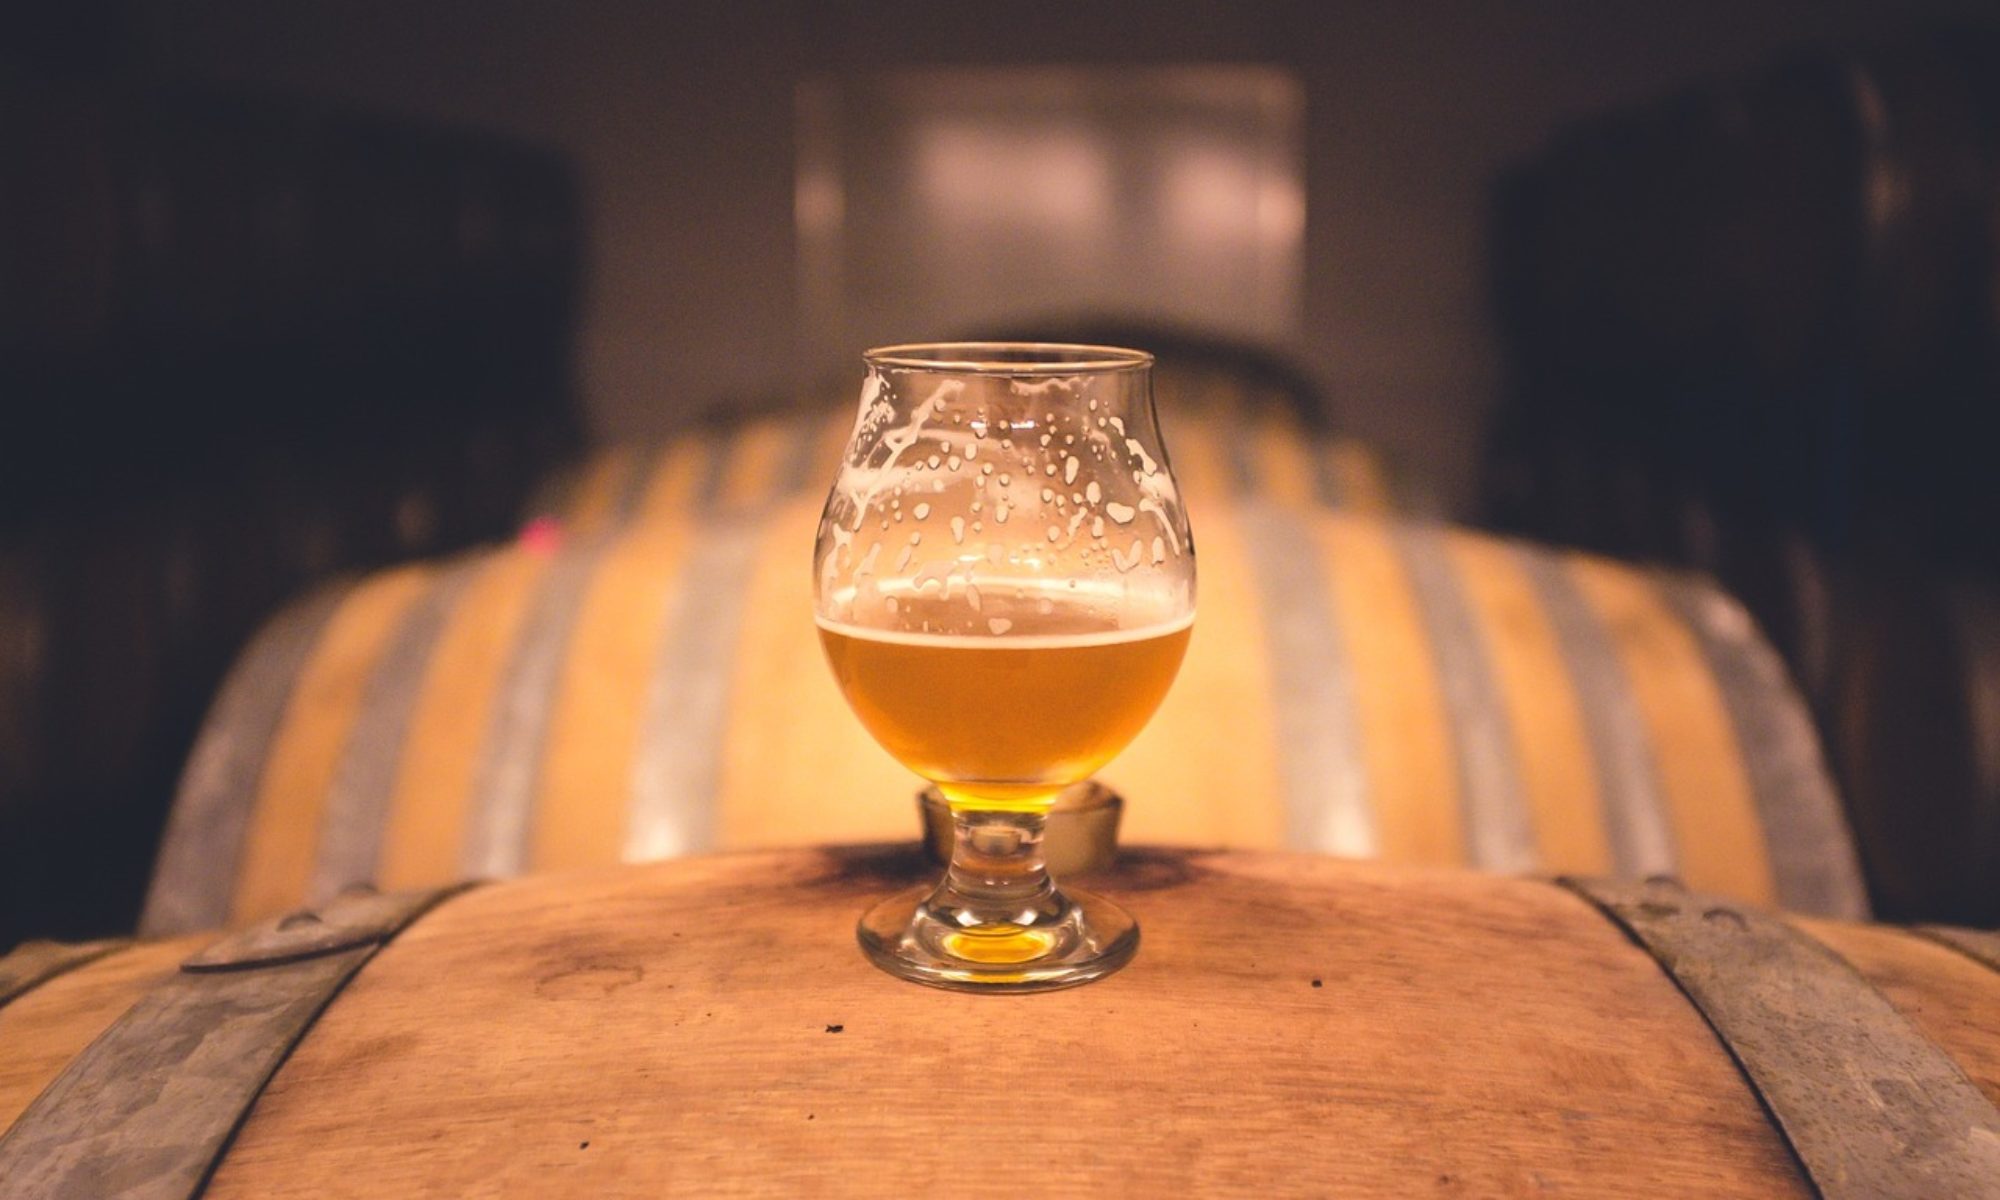
You will not wonder if it happened to you. You will walk up to your tap, excited after a long day at work to pull a pint of your favorite cider or other beverage. What comes out may knock you over. The sulfur smell some people are experiencing from their Perlick 650SS taps is real, is unmistakable, and thankfully is avoidable.
What I present here is not new. I learned about it in a thread on HomeBrewTalk.com where members “agrazela” (Agrazela, 2016) and “sctcts” (C., 2016) summarized very succinctly what a lot of people had been discovering and sharing. While these summaries were very good, I believe they were somewhat more technical in nature and assumed some advanced capabilities or knowledge at the very least of terminology not generally used by homebrewers. I wanted to present in no uncertain terms exactly what a person needed to know to get rid of the issue once and for all. If you can follow a cookbook, you can get rid of the smell following this write-up.
The Issue
With a characteristic rotten egg smell, hydrogen sulfide is a poison. It is detectable at extremely low levels, with 50% of the population able to detect it at 0.47 parts per billion in the air (Iowa State University Extension, 2004). With lethal doses beginning at 320 to 530 ppm (Lindenmann, et al., 2010), or 681 to 1128 times higher than the detectable level, it is exceedingly unlikely that anyone need worry about toxicity of H2S from their taps.
Our taps are made of stainless steel; a few of the parts are made of 303 stainless steel (C., 2016) [See note at beginning of article]. This is a form of stainless which is specially formulated to be easy to machine by virtue of an addition of sulfur and phosphorous (ESPI Metals, 2016). All stainless steel is passivated after machining. Passivating is a process intended to allow a thin film of oxidation to form on the surface which in turn protects the steel. When this type of stainless steel is passivated with nitric acid, manganese is etched from the surface while allowing elemental sulfur to be retained (Shen, 2004).
This elemental sulfur on the surface of the stainless steel and within crevices formed by etching of the manganese is assumed to be the root of our issue. Empirical evidence strongly backs this theory. The theory continues that when a highly acidic liquid such as a some wines, kombucha, cider, or cleaners like Star San are left in contact with these surfaces, the elemental sulfur (S2-) combines with the free hydrogen ions (H+) provided by the acid to form H2S, to greatly offend our sensibilities. Generally a few ounces through the tap are all that is required to flush the smell away. The smell will continue to come back after the system has time to sit with the acidic liquid again. Some suppliers have even gone so far as to recommend not using the 650SS for more acidic beverages (Adventures in Homebrewing, 2016).
Trial and error has led to the common belief that a single part, the handle lever, may be the only part responsible for all the trouble (Agrazela, 2016). Since reports of the sulfur smell come only from the owners of the 650SS faucets, the parts unique to this faucet design are reasonable suspects. We will target three parts within the faucet to be sure of our efficacy (C., 2016).
In order to rid the parts of the issue once and for all, the parts must be thoroughly cleaned, the sulfur deposits removed and the parts re-passivated. These steps can be followed easily in one’s kitchen with a minimum of special equipment and ingredients. Most homebrewers should possess the tools needed to get the job done. The chemicals are available locally.
The Process
The faucets will be disassembled, cleaned, passivated and cleaned again. The original process used to passivate the parts during manufacturing is assumed to have used nitric acid. We will follow a process based on the citric acid passivation methods outlined in ASTM A967 (specifically, citric I) along with the recommendations by Shen (Shen, 2004).
Preparation
You will want to procure the following in addition to normal household utensils:
- Scale capable of at least 500g with at least 1g resolution
- [1]Two non-reactive, heat resistant containers of roughly 500 ml (or larger). Some options:
- Mason Jars
- Erlenmeyer flasks
- Beakers
- Polypropylene containers (The Engineering Toolbox, n.d.) – These show a recycle code of 05 – PP on the bottom
- Rubber gloves
- Safety glasses
- Household lye (Amazon: https://www.amazon.com/Rooto-1030-Corp-Drain-Cleaner/dp/B000PSFPRK)
- Citric Acid (Amazon: https://www.amazon.com/Citric-Acid-Quality-Sealed-Resealable/dp/B00K582CH6)
- Alcohol (rubbing, cheap vodka, etc.)
- Digital thermometer
- [2]Distilled water –Do not use tap water at the risk of staining or etching your parts
In addition to these items you will need several non-reactive spoons or other utensils for portioning and stirring. Most all tableware these days are stainless steel. If you have any doubts about your utensils, gather glass or other lab grade pieces suitable for the task at hand.
Disassembly

Do not completely disassemble the faucet. Some of the O-rings and seals are more difficult to remove and will be damaged if you remove them. Perlick recommends replacement of several of the O-rings if they are removed. If your faucet has been in use, soak the faucet in warm cleaning solution for 1-2 minutes to help free the parts. If it is new, a dunk in warm water will help.
Refer to Figure 1 below. Remove the tap handle if you still have one on the faucet. Next, remove the handle jacket (1) from the handle lever. Unscrew the compression bonnet (2) and remove it and the bearing cup (4) from the handle lever. Lift upward on the handle lever (5a) and push back slightly to remove it from the faucet. Set the handle lever aside, this is one of the parts you will be passivating.
The entire flow control assembly is referred to by callout 11 in the diagram. Unscrew the flow control lever from the control barrel. Unscrew the compression bonnet and remove. Gently pull the control barrel from the body, noting the relationship between the pin on the end of the control barrel and the corresponding hole in the flow control compensator.
The control barrel has two O-rings. These may be gently removed to ensure the entire surface of the control barrel is accessible for passivation. There are two schools of thought on removing these O-rings. Some will remove them and some will recommend not risking damage to the O-rings believing that the solution will reach anywhere the beer will. This is a personal decision and the implications and risks should be considered.
Set the flow control barrel aside, this is the second piece to be passivated. At this point the flow-control compensator (9) should freely slide out of the rear of the faucet. Removal of the coupling gasket (8) is not necessary. The flow-control compensator is the third and final piece to be set aside to be passivated.
The Mix
Lye solution, especially as it gets hot, will cause severe burns to skin, eyes, and mucous membranes (Certified Lye, 2013). It is a severe caustic substance and will ruin your day. It is used in soap making and a lot of people use it safely every day with reasonable precautions, so have a look on the Internet for Lye Safety and have a good read before messing with it. One such article is the Soap Queen’s Back to Basics: Lye Safety Guide (White, 2015). Regardless, it is pretty nasty stuff so do yourself a favor and make this a beer-free endeavor. You can RDWHAHB afterwards.
If you have at least two containers, prepare them ahead of time to make things go more smoothly. If not there’s no time-critical nature to the process and you can do it as you go along. In one of the containers prepare a 5% lye solution, in one prepare a 10% citric acid solution. To prepare either solution, follow these steps:
- Don your safety gear (glasses & gloves at a minimum).
- Mark your container with the name of the solution you intend to make (5% Lye or 10% Citric).
- Place your container on your scale and tare the scale.
- Pour ~300 grams of distilled water into the container. The exact amount is not important, measuring it is.
- Multiply that weight by 0.05 if you are making the lye solution, and 0.10 if you are making the citric acid solution. g.: if you poured 312 grams of water and you are making the 5% lye solution:
312g * 0.05 = 15.6g - Tare the scale with a dry cup or plate. Measure that amount of the dry chemical (in this case 16g of lye) into the cup or plate.
- Pour the chemical into the water (NOT the other way around, EVER!) and stir until it is in solution. Lye dissolving into water will create heat. Do not let the undissolved lye rest on the bottom of the container or it will create localized heat and potentially crack the container. If stirred, this amount of lye will not create enough heat to cause a problem. Do this in/over the sink in case of accidental spillage or breakage.
- Set the marked containers back from the edge of the counter to prevent accidents, and proceed.
You’ve completed the hardest part of the entire process. You can reward yourself with a pat on the back and a deep breath of relief. The rest is easy.
The Cook
First, give the parts a good cleaning with dishwashing detergent. The initial lye wash is more than likely going to remove almost anything that is on the parts, but I don’t know if it will remove keg lube for instance. Taking a few extra seconds is pretty cheap insurance. Use a brush to get the nooks and crannies. Once the parts are clean, place them in a dish or other container with your cheap alcohol which is used as a wetting solution.
Next, raise the temperature of your first 5% lye solution to between 160° and 180° F (70° and 80° C). I found this easiest to do in a double-boiler setup. I first raised a pot of water to boiling and then placed the flask containing the solution in the pot while turning the heat to low. Keep the outer water at 170° F (75° C) and swirl occasionally. It will take a few minutes for the temperatures to equalize so you can either measure the inner container, or give it about 5 minutes arbitrarily. After it has reached temp (or after 5 minutes) set your timer for 30 minutes and drop in the parts carefully to avoid splashing. Stir or swirl occasionally.
After 30 minutes has passed, fish or strain out your parts and give the parts a quick rinse with distilled water. Drop them back in the alcohol wetting solution as you prepare the next bath. Repeat this process with the 10% citric acid solution at 150° F (65° C) for 30 minutes, rinse and rest in the wetting solution while bringing the lye solution back to heat. Bathe in the 5% lye solution again at 160° to 180° F (70° to 80° C) for 30 minutes. After completing all three baths, you will have completed the process to remove the sulfur deposits and re-passivate your faucet parts.
You will also note that the second bath, the 10% citric acid, may generate some odor. This is a good thing. The odors we generate here are smells we will not get when we pull a beer. I did not notice the smell was as strong as it was when I had a cider on tap, but it was definitely noticeable so you will want to make sure you have the windows open or an exhaust fan running.
When it comes time to dispose of these solutions: Pouring the solutions down the drain poses no issues to your drains. Lye is commonly used to clear drains, and citric acid is generally regarded as safe (U.S. Food and Drug Administration, 2015). Be sure to check local regulations of course, and be sure to flush with plenty of cool water.
Assembly
Refer to Figure 1 above for an exploded diagram. Slide the flow-control compensator (9) in from the rear of the faucet. The open end goes in with the rounded end out. Note that there is a single hole in the smooth part on the side of the compensator that corresponds with the pin on the flow control barrel. This hole should be visible through the hole in the faucet body for the flow control assembly.
Replace the O-rings on the flow-control barrel. Slide the barrel into the side of the faucet. A thin coat of keg lube on the O-rings will help assembly. The post on the end of the barrel must engage the hole in the side of the flow-control compensator. Replace the compression bonnet hand tight on the valve assembly and tighten until snug. Replace the flow-control lever and verify operation of the flow-control valve. Turning the level should cause the flow-control compensator to move in and out of the rear of the faucet.
Slide the handle lever (5a) back into the faucet body with a slight forward motion and then to the back until it seats against the front seat (7). Ensure the flat sides of the threaded portion of the handle lever are oriented to the sides of the faucet, slide the bearing cup (4) concave surface down over the handle lever. The bearing cup fits into a recess into the faucet body when properly installed.
Re-install compression bonnet (2) hand tight only over the faucet body and handle lever. Re-install handle jacket (1) onto handle lever.
Summary
Again I want to be clear I’m not presenting data that is new. I’m not an expert at this and I don’t presume to be breaking news. I would not be able to share this were it not for the people who came before me. I wanted only to allow someone who might not yet follow what’s going on to be able to fix their faucets. Frankly it sucks to have to go through this and I think Perlick ought to own up to it. Until then, this is what we have.
References
Adventures in Homebrewing. (2016). Perlick 650SS flow control faucet. Retrieved from Adventures in Homebrewing: http://www.homebrewing.org/Perlick-650SS-flow-control-faucet_p_4896.html
Agrazela. (2016, March 10). Examining possible solutions to issue of sulfur smell from Perlick 650ss faucets. Retrieved from HomeBrewTalk.com: http://www.homebrewtalk.com/showpost.php?p=7463562&postcount=17
C., S. (2016, March 13). Examining possible solutions to issue of sulfur smell from Perlick 650ss faucets. Retrieved from HomeBrewTalk.com: http://www.homebrewtalk.com/showthread.php?p=7468733#post7468733
C., S. (2016, March 16). Examining possible solutions to issue of sulfur smell from Perlick 650ss faucets. Retrieved from HomeBrewTalk.com: http://www.homebrewtalk.com/showpost.php?p=7472964&postcount=66
Certified Lye. (2013, May 1). Material Safety Data Sheet: Sodium hydroxide. Retrieved from Certified Lye: http://www.certified-lye.com/MSDS-Lye.pdf
ESPI Metals. (2016, April 17). Stainless Steel 303 – Alloy Composition. Retrieved from Welcome to ESPI Metals: http://www.espimetals.com/index.php/technical-data/199-stainless-steel-303-alloy-composition
Iowa State University Extension. (2004). The science of smell part 1: Odor perception and physiological response. Iowa State University Extension.
Lindenmann, J., Matzi, V., Neuboeck, N., Ratzenhofer-Komenda, B., Maier, A., & Smolle-Juettner, F. M. (2010, December). Severe hydrogen sulphide poisoning treated with 4-dimethylaminophenol and hyperbaric oxygen. Diving and Hyperbaric Medicine: the Journal of the South Pacific Underwater Medicine Society, 40(4), pp. 213–217.
Magee, J. H., & Mohr, R. K. (2016). Passivating and Electropolishing Stainless Steel Parts. Retrieved from Carpenter Technology Corporation.
Perlick. (2014). Perlick Forward Sealing Beer Faucets. Retrieved from Perlick Corporation: https://www.perlick.com/files/8414/0423/2648/Forward_sealing_faucets_-_spec_sheet.pdf
Shen, T. H. (2004, April 22). The Cleaning of 303 Stainless Steel. Retrieved from Lawrence Livermore National Laboratory: https://e-reports-ext.llnl.gov/pdf/307089.pdf
U.S. Food and Drug Administration. (2015, April 1). CFR – Code of Federal Regulations Title 21. Retrieved from U.S. Food and Drug Administration: https://www.accessdata.fda.gov/scripts/cdrh/cfdocs/cfcfr/CFRSearch.cfm?fr=184.1033
White, E. (2015, July 20). Back to basics: Lye safety guide. Retrieved from Soap Queen: https://www.soapqueen.com/bath-and-body-tutorials/tips-and-tricks/back-to-basics-lye-safety-guide/
[1] Things to consider with these containers: Lye will generate a good amount of heat when added to water. Borosilicate labware is ideal for something like this. Mason jars are capable of withstanding quite a bit of heat however. If the lye is stirred in without letting it sit on the bottom of the jar for too long, it will be fine. Do not use Pyrex measuring cups for reasons that take too long to explain here. Erlenmeyer flasks such as you use for yeast starters are great for swirling, but harder for fishing parts out. Read through the guide and think about how you will work through each step before buying anything.
[2] Tap water may be suitable if it is very low in minerals. It is safest to use distilled water especially given the very low cost for a gallon of it compared to the cost of one of these faucets.